I have recently built a machine using Intel's latest i7 processor and MSI Eclipse x58 motherboard. The idea was to build a high end machine for my application development and research work at home and I wanted to make use of server virtualization technology. This will dramatically improve the efficiency and availability of resources and applications that are hosted in a machine. I have chosen 10 GB RAM and 2 TB Harddrive with hardware raid in addition to the facilities provided by i7 64 bit processor and MSI Eclipse x58 motherboard offers.
Intel i7 Processor
Intel has brought back Hyper Threading technology with this latest i7 processor. Some of the core features of i7 processor are given below.
- 2.93 GHz and 2.66 GHz core speed
- 8 processing threads with Intel® HT technology
- 8 MB of Intel® Smart Cach
- 3 Channels of DDR3 1066 MHz memory
- Intel 64 Bit Architecture
- Intel Virtualization technology
I have chosen MSI's latest x58 mother board for my machine. The MSI Eclipse x58 is the company’s first X58 motherboard for Intel Core i7. MSI stands for Micro Star International.
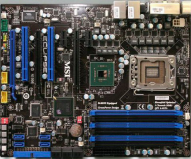
The motherboard is black in color. The copper heatpipes and attached heatsinks are moderate in size, implicitly assuming that the X58 chip, VRM's and Southbridge won't get too hot. Please click here to see MSI Eclipse x58 photo gallery.
Fig 1. MSI Eclipse x58 Motherboard
 The MSI Eclipse features ten DrMOS High-C capacitors (six for the CPU, two for the northbridge and two for the QuickPath memory controller) which are designed for reliability and efficiency.
This motherboard features six DIMM slots to take advantage of Nehalem’s triple-channel DDR3 memory controller and can utilize up to 24GB of DDR3-1333+ RAM. It also supports overclocking as well.
HardWare Raid
The hardware-based system manages the RAID subsystem independently from the host and presents to the host only a single disk per RAID array.
An example of a Hardware RAID device would be one that connects to a SCSI controller and presents the RAID arrays as a single SCSI drive. An external RAID system moves all RAID handling "intelligence" into a controller located in the external disk subsystem. The whole subsystem is connected to the host via a normal SCSI controller and appears to the host as a single disk.
RAID controllers also come in the form of cards that act like a SCSI controller to the operating system but handle all of the actual drive communications themselves. In these cases, you plug the drives into the RAID controller just like you would a SCSI controller, but then you add them to the RAID controller's configuration, and the operating system never knows the difference.
Software Raid
Software RAID implements the various RAID levels in the kernel disk (block device) code. It offers the cheapest possible solution, as expensive disk controller cards or hot-swap chassis are not required. Software RAID also works with cheaper IDE disks as well as SCSI disks. With today's fast CPUs, Software RAID performance can excel against Hardware RAID.
The MD driver in the Linux kernel is an example of a RAID solution that is completely hardware independent. The performance of a software-based array is dependent on the server CPU performance and load.
Virtualization
Virtualization is a proven software technology that is rapidly transforming the IT landscape and fundamentally changing the way that people compute. Today’s powerful x86 computer hardware was designed to run a single operating system and a single application. This leaves most machines vastly underutilized. Virtualization lets you run multiple virtual machines on a single physical machine, sharing the resources of that single computer across multiple environments. I have picked VMWare because they are the market leader in Virtualization.
I wanted to use VMWare's latest ESX 3i 3.5 build as my server virtualization software. However, it did not support the hardware I have. The reason why I chose ESX3i over other VMWare products was because ESX3i is an OS-independent VMware hypervisor. So it does not need a host OS to run. VMware ESXi’s 32MB disk footprint is a fraction of the size of a general purpose operating system, reducing complexity and providing unmatched security and reliability.
Ubuntu 8.10 64 bit Server
Since ESX3i did not work for me. My other alternative was to try VMWare's latest VMWare server 2.0. This needs a host OS to run. I wanted to use Linux as the base server since the overhead with Linux is very minimum compared to Windows. I have initially chosen Ubuntu 8.0.4.02 LTS server as my base server. However, it also had issues with my hardware and seemed to hang some times. So I uninstalled Ubuntu 8.0.4.02 and installed Ubuntu 8.10 64 bit Server. Some of the issues with Ubuntu 8.0.4.02 were to do with the linux kernel version itslef. The kernel that comes with Ubuntu 8.10 is 2.6.27.x. The installation of Ubuntu 8.10 64 bit server was breeze and it detected all my hardware with no problems at all. Ubuntu 8.10 has a better support for software raid. However, I have chosen the hardware raid over the software raid simply because it was so easy to set it up at the BIOS level and I have two 1 TB hard drives for the mirror. The sata ports 7 and 8 in MSI Eclipse x58 Motherboard are dedicated for hard ware raid whereas 9 and 10 for eSata raid (External Hard Drives).
On distrowatch.com Ubuntu is listed as the most accessed distribution. The popularity of Ubuntu suggests that there will be business and job opportunities for those who are trained in configuration of the Ubuntu Server.
The Ubuntu Server Edition - built on the solid foundation of Debian which is known for its robust server installations — has a strong heritage for reliable performance and predictable evolution. It also supports server virtualization out of the box.
Ubuntu Server Edition JeOS (pronounced "Juice") is an efficient variant of the server operating system, configured specifically for virtual appliances.
JeOS is no longer provided as a separate ISO. Instead, it is an option that is activated on the server installer by pressing F4 on the first screen and selecting the "Install a minimal virtual machine" option. I have used JeOs from the same server installable CD to create other virtual machines.
Please click here to read more about Ubuntu 8.10 server features.
VMWare Server 2.0
I have downloaded VMWare Server 2.0 for 64 bit Linux TAR image (not the RPM image) from VMWare web site. I also activated the license key for the server. Obtaining the free license key or serial number is a very simple procedure from VMWare web site. You need to create an account with VMWare first and follow the instructions on the web site.
Instructions to install VMWare server 2.0 on Ubuntu 8.10 64 bit Server
Step 1. Log on to Ubuntu 8.10 server. Make sure the login id has administrator privileges.
Step 2.Install kernel headers which in my case was 2.6.27-7-generic (to do this use synaptic or apt-get )
Note : for finding your running kernel version use the command uname -a
sudo apt-get install linux-headers-`uname -r` build-essential xinetd
cd /home/administrator
Unpack the VMware Server .tar.gz file and run the installer:
tar xvfz VMware-server-*.tar.gz
cd vmware-server-distrib
sudo ./vmware-install.pl
The installer will ask you a lot of questions. You can always accept the default values simply by hitting
When the installer asks you
In which directory do you want to keep your virtual machine files?
[/var/lib/vmware/Virtual Machines]
you can either accept the default value or specify a location that has enough free space to store your virtual machines.
At the end of the installation, you will be asked to enter a serial number:
Please enter your 20-character serial number.
Type XXXXX-XXXXX-XXXXX-XXXXX or 'Enter' to cancel:
Fill in your serial number for VMware Server.
After the successful installation, you can delete the VMware Server download file and the installation directory:
cd /home/administrator
rm -f VMware-server*
rm -fr vmware-server-distrib/
vsock = VM communication interface socket
If you have accepted all default values during the installation, root is now the VMware Server login name. On Ubuntu, root has no password by default, therefore we create a password now:
sudo passwd
Enter new UNIX password:
Retype new UNIX password:
After reset root password. It will show this message in Shell.
passwd: password updated successfullyVMware Server 2 does not have a desktop application for managing virtual machines - this is now done through a browser (e.g. Firefox). You can access the management interface over HTTPS (https://
Fig 2: VMWare Server 2.0 Management Web Interface
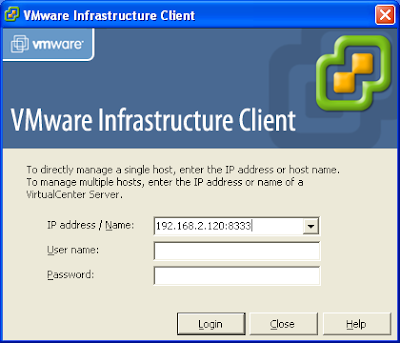
If you're using Firefox 3 and use HTTPS, Firefox will complain about the self-signed certificate, therefore you must tell Firefox to accept the certificate - to do this, click on the kink Or you can add an exception.Alternately, you can also manage the virtual machines using Virtual Machine Infrastructure Client that comes with ESX3i. The default https port Virtual Machine Infrastructure Client uses is 443. So if you have chosen 8333 as the default port for VMWare Server 2.0 , then in the Virtual Machine Infrastructure Client login, you may also have to use the port 8333 as seen in the following figure.
Fig 3. Virtual Machine Infrastructure Client Login


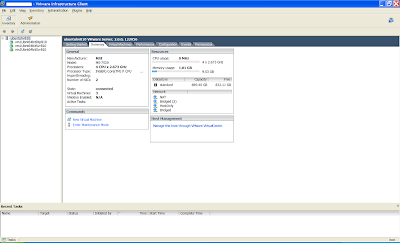
Fig 4: Virtual Machine Infrastructure Client Management Interface

References
1. VMWare - http://www.vmware.com/products/server/
2. Ubuntu Web Site - https://help.ubuntu.com/8.10/serverguide/C/index.html
3. Ubuntu Installation Guide - https://help.ubuntu.com/8.10/installation-guide/amd64/index.html
4. Ubuntu Forums - http://ubuntuforums.org/
Conclusion
VMware Server Infrastructure unifies discrete hardware resources to create a shared dynamic platform, while delivering built–in availability, security and scalability to applications. It supports a wide range of operating system and application environments, as well as networking and storage infrastructure.

